When it comes to fly fishing – the area most people trip up is with their knot tying skills. It’s not that difficult to understand the concepts of fly fishing and gather all the equipment, but a significant difference between spin rods and fly rods is the amount of knot tying required to rig your rod.
There are many MANY different knots you could learn, but I’m focusing on the simplest ones that offer the most reliability with the least amount of skill. These knots will allow you to easily line your rod so you can spend less time practicing knot tying and more time fishing.
If you don’t see the knot you are looking for in the article, in the end, I will include a list of some more advanced knots and the resources you need to learn them. For now, let’s focus on the basics.
Understanding The Rod: From Reel to Tip
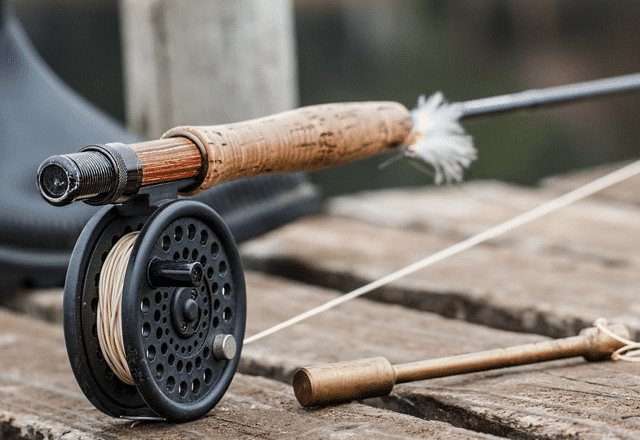
To understand what knots you need and where you first need to understand the way a fly rod is rigged starting with the reel. The line you use to wrap around your reel is called the backing. This section of line is thin and is used primarily as excess length to keep your fly line off the reel. The backing requires a knot to secure it to the reel properly, that’s your first knot.
From the backing, you tie that to your fly line which is a much thicker line, and it acts as the majority of your weight. This area is where you have your second knot.
Your third knot comes between your fly line and your leader. A leader is not entirely necessary, but most anglers use leaders because they lower the visibility of the big bulky fly line and it acts as additional protection from rocks and debris in the water.
Next, you have to tie your leader to your tippet which is another aid to prevent you from scaring away the fish. This is your fourth knot.
The last knot you’ll tie is from your tippet to your fly. So that’s five knots in total to line your fly rod.
Are you overwhelmed yet? It can seem intimidating to have to tie so many knots, but luckily you’ll only have to do this a few times per season if that. Usually, you’ll just change your tippet or fly, and the rest can stick around for the whole season.
Now let’s get into each knot that you’ll use for every step of the process.
Connecting Your Backing to the Reel: Arbor Knot

First, you need to decide how much backing is the right amount and luckily most manufacturers will include these specifications on their reel. If you don’t have that resource, generally enough backing to fill the entire reel with about ⅛ on each side is enough. Backing helps you wind your line faster and acts as a backup when you’re playing a big fish.
The arbor knot is simple and effective if you lose your rod overboard and need to pull it back by the line. Here’s how you tie an arbor knot.
- Wrap your line around the arbor of the spool and tie a basic overhand knot with the tag end.
- Tie another overhand knot about an inch from the first one.
- By pulling the second knot tight, you should be able to slide it down towards the first overhand knot pushing it down up against the reel, so they are both snug.
- Trim excess line
Connecting Your Fly Line to the Backing: Albright Knot

Now that your backing is tightly knotted around your reel, it’s time to connect your fly line to the backing.
On your fly line, one end of it should be tagged saying “this end to reel,” make sure you use that end to tie to your backing. Some fly line or backings will come with a factory welded loop built in so you can use that if you choose, if not you could make a loop yourself with the fly line to tie the albright knot around it.
Here are the steps you need to take to properly secure your fly line to your backing, using the albright knot.
- Make a loop with your fly line (or use factory loop)
- Pull about one foot of your backing through the loop.
- At this point, you should have three lines held between your finger. Two being your fly line and the third being your backing.
- Start wrapping the backing line over the two pieces of fly line sections.
- Make ten tightly wrapped loops and feed the tagged end back through the loop.
- Make sure the tagged end exits the loop the same way it came in.
- Slide the wrapped sections to the end of the loop and pull the tagged end of the backing till everything is tight.
- Trim excess line.
Connecting Your Leader to the Fly Line: Nail Knot
 The nail knot gets a bad reputation for being difficult to tie, but I’ve never found any issue tying it, and it gives your line a clean and sturdy appearance. You’ll want to use this knot when tying your leader to your fly line because you want that knot to be as small and unnoticeable as possible.
Your leader will protect your line from excess damage and act as a decoy by being less bulky in the water.
Here are the steps towards tying your nail knot:
- Using a nail, put it up against the end of your fly line.
- Get your leader and put that up against the other side of your fly line leaving about a foot in length to tie your knot.
- At this point, you should have your leader, fly line, and nail in between your fingers with some excess leader line to tie with.
- Tie at least six loops around your fly line and nail making sure to keep them tight and snug.
- Now, remove the nail and feed the butt end of the leader through the space left where the nail was.
- Pull the butt end tight, so it tightens up the loops and trim the extra line.
Connecting Your Tippet to the Leader: Surgeon’s Knot
One of the simplest knots to tie is the surgeon’s knot. Most anglers use this to secure the tippet to the leader, but you could also use this to secure your line to the leader. This knot is useful when you have two lines that differ greatly in diameter.
Here are the instructions you need to follow to tie a surgeons knot:
- Lay both your tippet and leader next to each other giving each at least ten inches of overlap.
- With both lines, form a circular loop.
- Pass the butt end of both through the loop two times.
- You could pass both lines through the loop again if you want to make the knot even tighter.
- Pull the ends tight and snip off the excess.
Connecting Your Fly to the Tippet: Improved Clinch Knot

In my opinion, the most important knot is the one you use to tie your fly to your tippet because this one is going to take a beating and it requires the most strength. Many anglers recommend using the improved clinch knot to tie your fly to your tippet because it’s simple and offers the reliability you need to keep your fly on the line.
Here are the steps to tie an improved clinch knot:
- Slide the end of your line through the hook.
- On the way back loop the end of the line back around your line at least five times.
- Bring the end back through the first loop by the eye of the hook.
- Pull the end through the large loop you now have.
- Pull it tight and trim the excess.
Other Great Fly Fishing Knots
Here are some additional knots you could learn to master your fly knot tying skills. They are more advanced and not entirely necessary unless you want to learn them.
- Uni Knot
- Orvis Tippet Knot
- Davy Knot
We cannot stress enough the importance of proper knot tying skills when it comes to fly fishing. A regular loop knot will not handle the whipping and thrashing of fly fishing, and the last thing you want to do is lose a nice catch or a bunch of flies at a few bucks a piece.
All the knots we covered above will allow you to correctly line your rod with the reliability you need to fish all season long without having to tie anything again.


