There’s one thing that scares every trailer owner: lighting issues. If you don’t know what you’re doing, a simple blown bulb can cost you an entire weekend at the lake. Knowing how to fix or replace your boat trailer lights can save time and money.
In this article, we’ll review everything you need to know about replacing boat trailer lights, from wiring to all the different types.
The Basics of Trailer Lights

Boat trailers have several different sets of lights. These are dependent on the length and width of the trailer as well as state and local ordinances. You’ll want to check your state laws regarding trailer lights, but most are fairly standard.
Boat trailers are grouped into two categories: over 80” wide and under 80” wide. There are different lighting requirements for each classification. There are other considerations for trailers over 30’ long, regardless of width. Let’s review the basics.
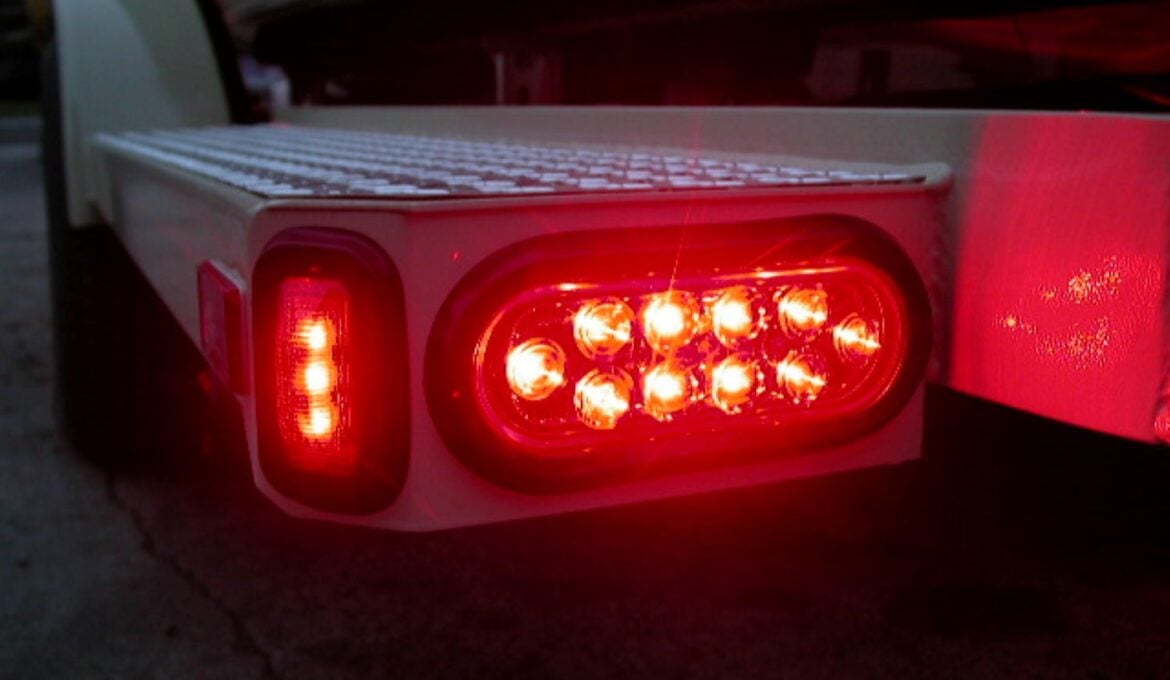
Taillights
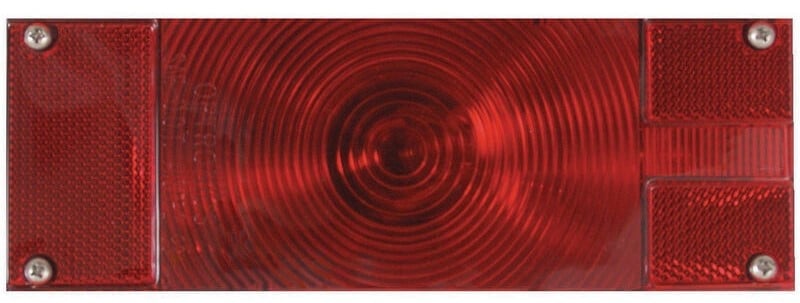
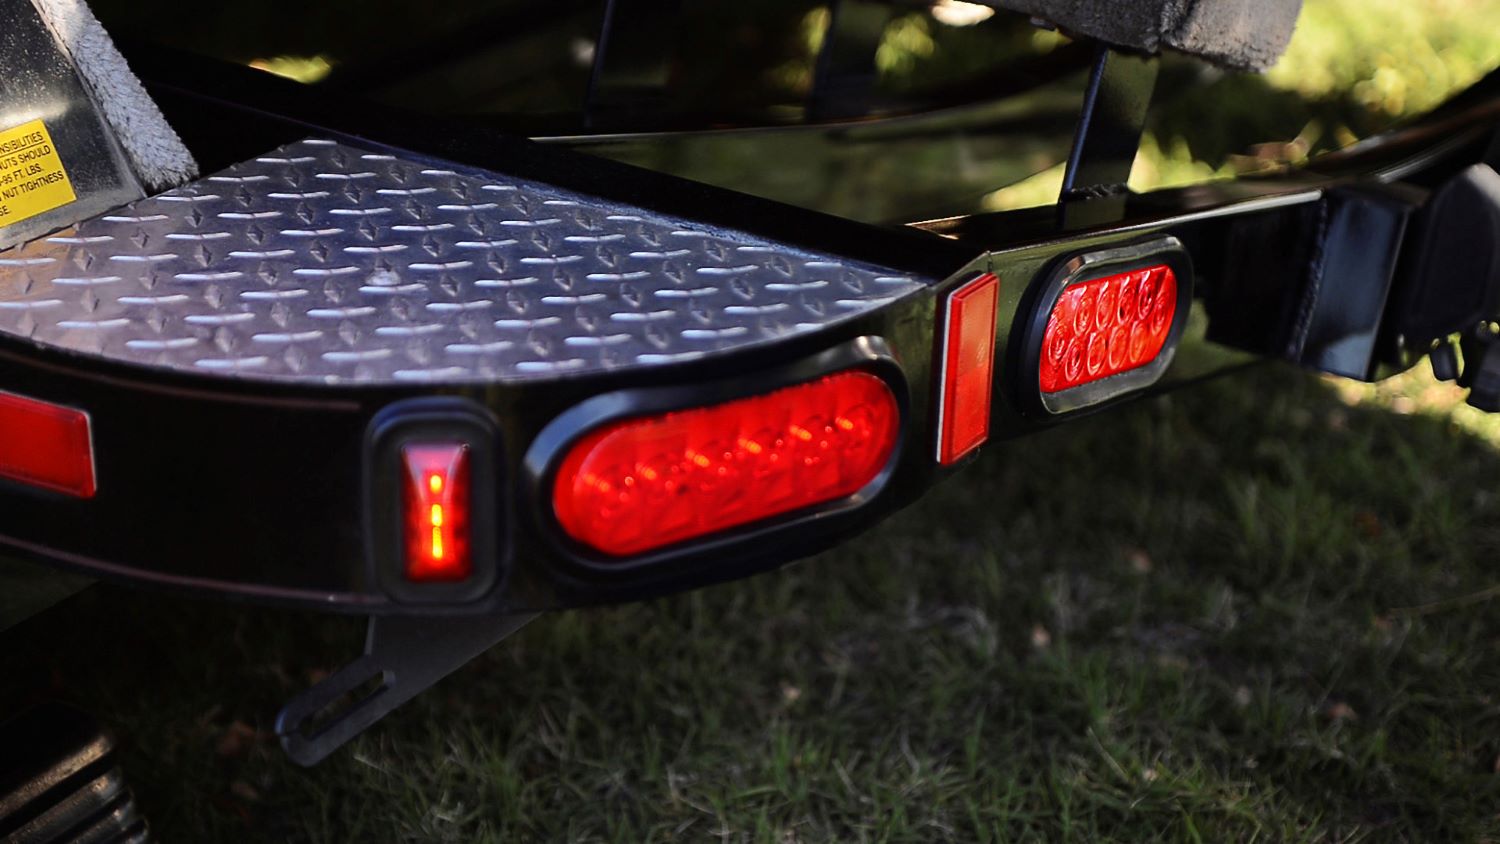
The main lights on your trailer at the rear are known as the taillights. These come in many shapes and sizes, from round to square or rectangular. The width of the trailer often dictates the size of the taillights. They contain signals for the stop lamps, turn signals, and running lights.
Trailer taillights are very important. A lot of times, the taillights on your vehicle are blocked by the boat. Therefore, your trailer taillights are all that can be seen from behind. These signal to other motorists when you’re braking or turning.
Side Marker/Clearance Lights
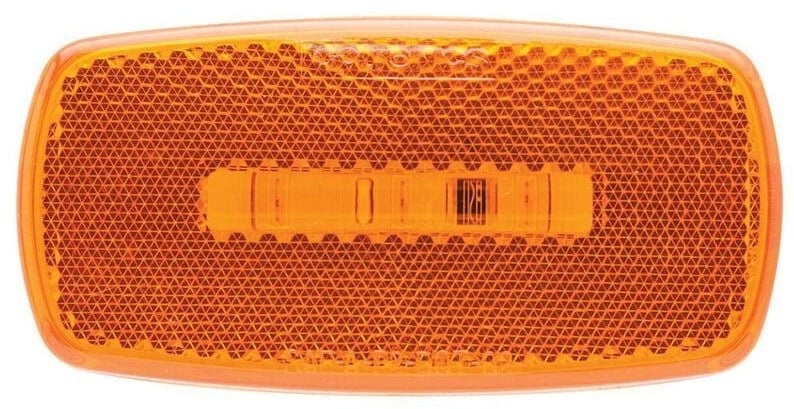
These lights go by different names; side marker and clearance are the most common. They are much smaller than taillights and typically come in a round or rectangular shape. They are amber or red in color, depending on the location and your state laws.
These lights serve one function: illuminating when the running light circuit is activated. They are designed to provide visibility at night to other motorists.
Reflectors
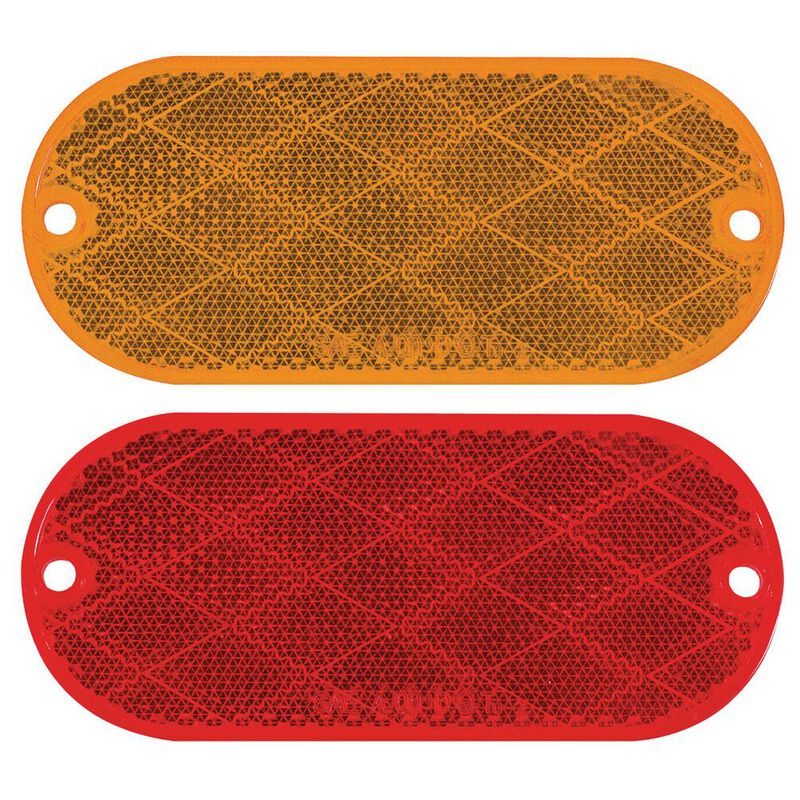
Reflectors come in many types, from stick-on tape to separate reflector housings. Most newer trailers feature reflectors built into the existing lights. Reflectors don’t have active power but are visible when another light shines on them. They are required at both the side and rear of the trailer.
License Plate Lamp
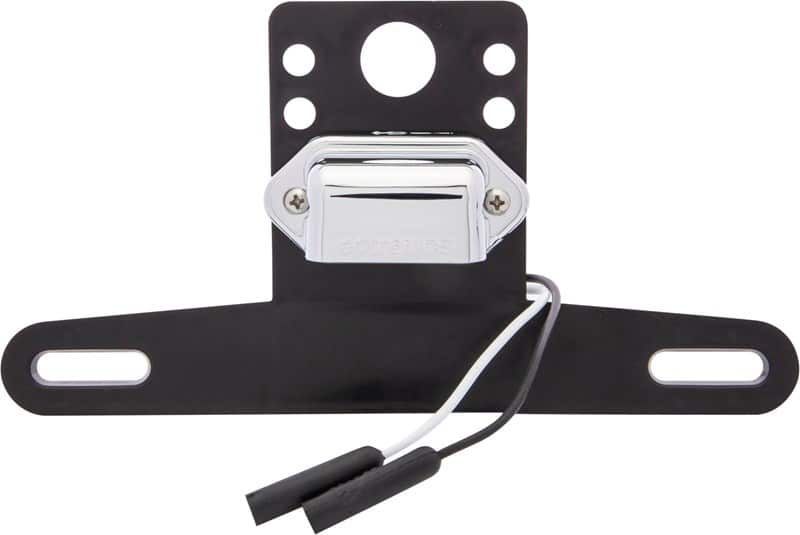
License plate lights are required in nearly every state while driving at night. You’ll commonly find these built into your taillight housing, but they are also offered separately.
LED vs. Incandescent
Most trailers come with incandescent lights as they are cheaper than LED, but upgrading to LED trailer lights has many benefits.
For starters, LEDs burn brighter so they’ll be visible from farther away, and they last longer, so you’ll spend less time and money replacing them. LEDs also require less electricity, so they are not as demanding on the tow vehicle’s trailer lighting circuits. Smaller, more affordable wiring can be used with them, saving money.
There are two ways to upgrade to LED lights: replace the entire housing or change out the bulb. The former is recommended as most boat trailer lights are sealed, and breaking that seal could let in water. If you do opt for the option of replacing just the bulb, remember you’ll need to use a bulb that matches the color of the house. When replacing a taillight bulb, you must use one that produces a red light. Using a white light will cause the taillights to appear pink while illuminated. The same is true when replacing your amber lights.
Boat Trailer Wiring Circuits
If you’re replacing or fixing lights, you must understand the wires and circuits that connect and operate them. Most boat trailers are pretty simple. Let’s go over the functions of the various circuits in more detail.
Brake – These lights are responsible for displaying when your brakes are applied, letting other motorists know when you’re coming to a stop.
Turn – Your turn signals display when you are making a turn, either left or right. They signal to other motorists when you are turning or changing lanes.
Running – Running lights illuminate at night, helping others see your trailer in the dark. These lights are displayed in both the taillights as well as the side marker and clearance lights.
Reverse – Although uncommon, some boat trailers come equipped with reverse lights, allowing greater visibility when backing up at night.
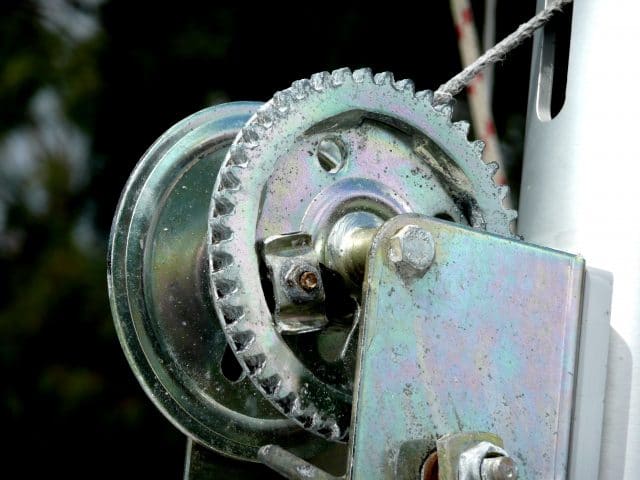
Battery Charge – If you have an onboard battery to power a winch or jack, you’ll have a wire run from the tow vehicle to the trailer’s battery to keep it charged while in transit.
Electric Brakes – If you have electric brakes, a circuit runs from the trailer connector back to each braking assembly on the trailer. This circuit applies current to the brake magnets, which helps slow the trailer down when braking.
Reverse Lockout – Trailers with surge brakes may or may not have an additional circuit running from the trailer connector to the brake actuator, which releases the brakes when reversing.
Trailer Connector Types
A trailer connector transfers the lighting circuits from the tow vehicle to the trailer. The connection is removable, which makes it easy to unhook when you are done towing. There are many types of trailer connectors; let’s review the most common.
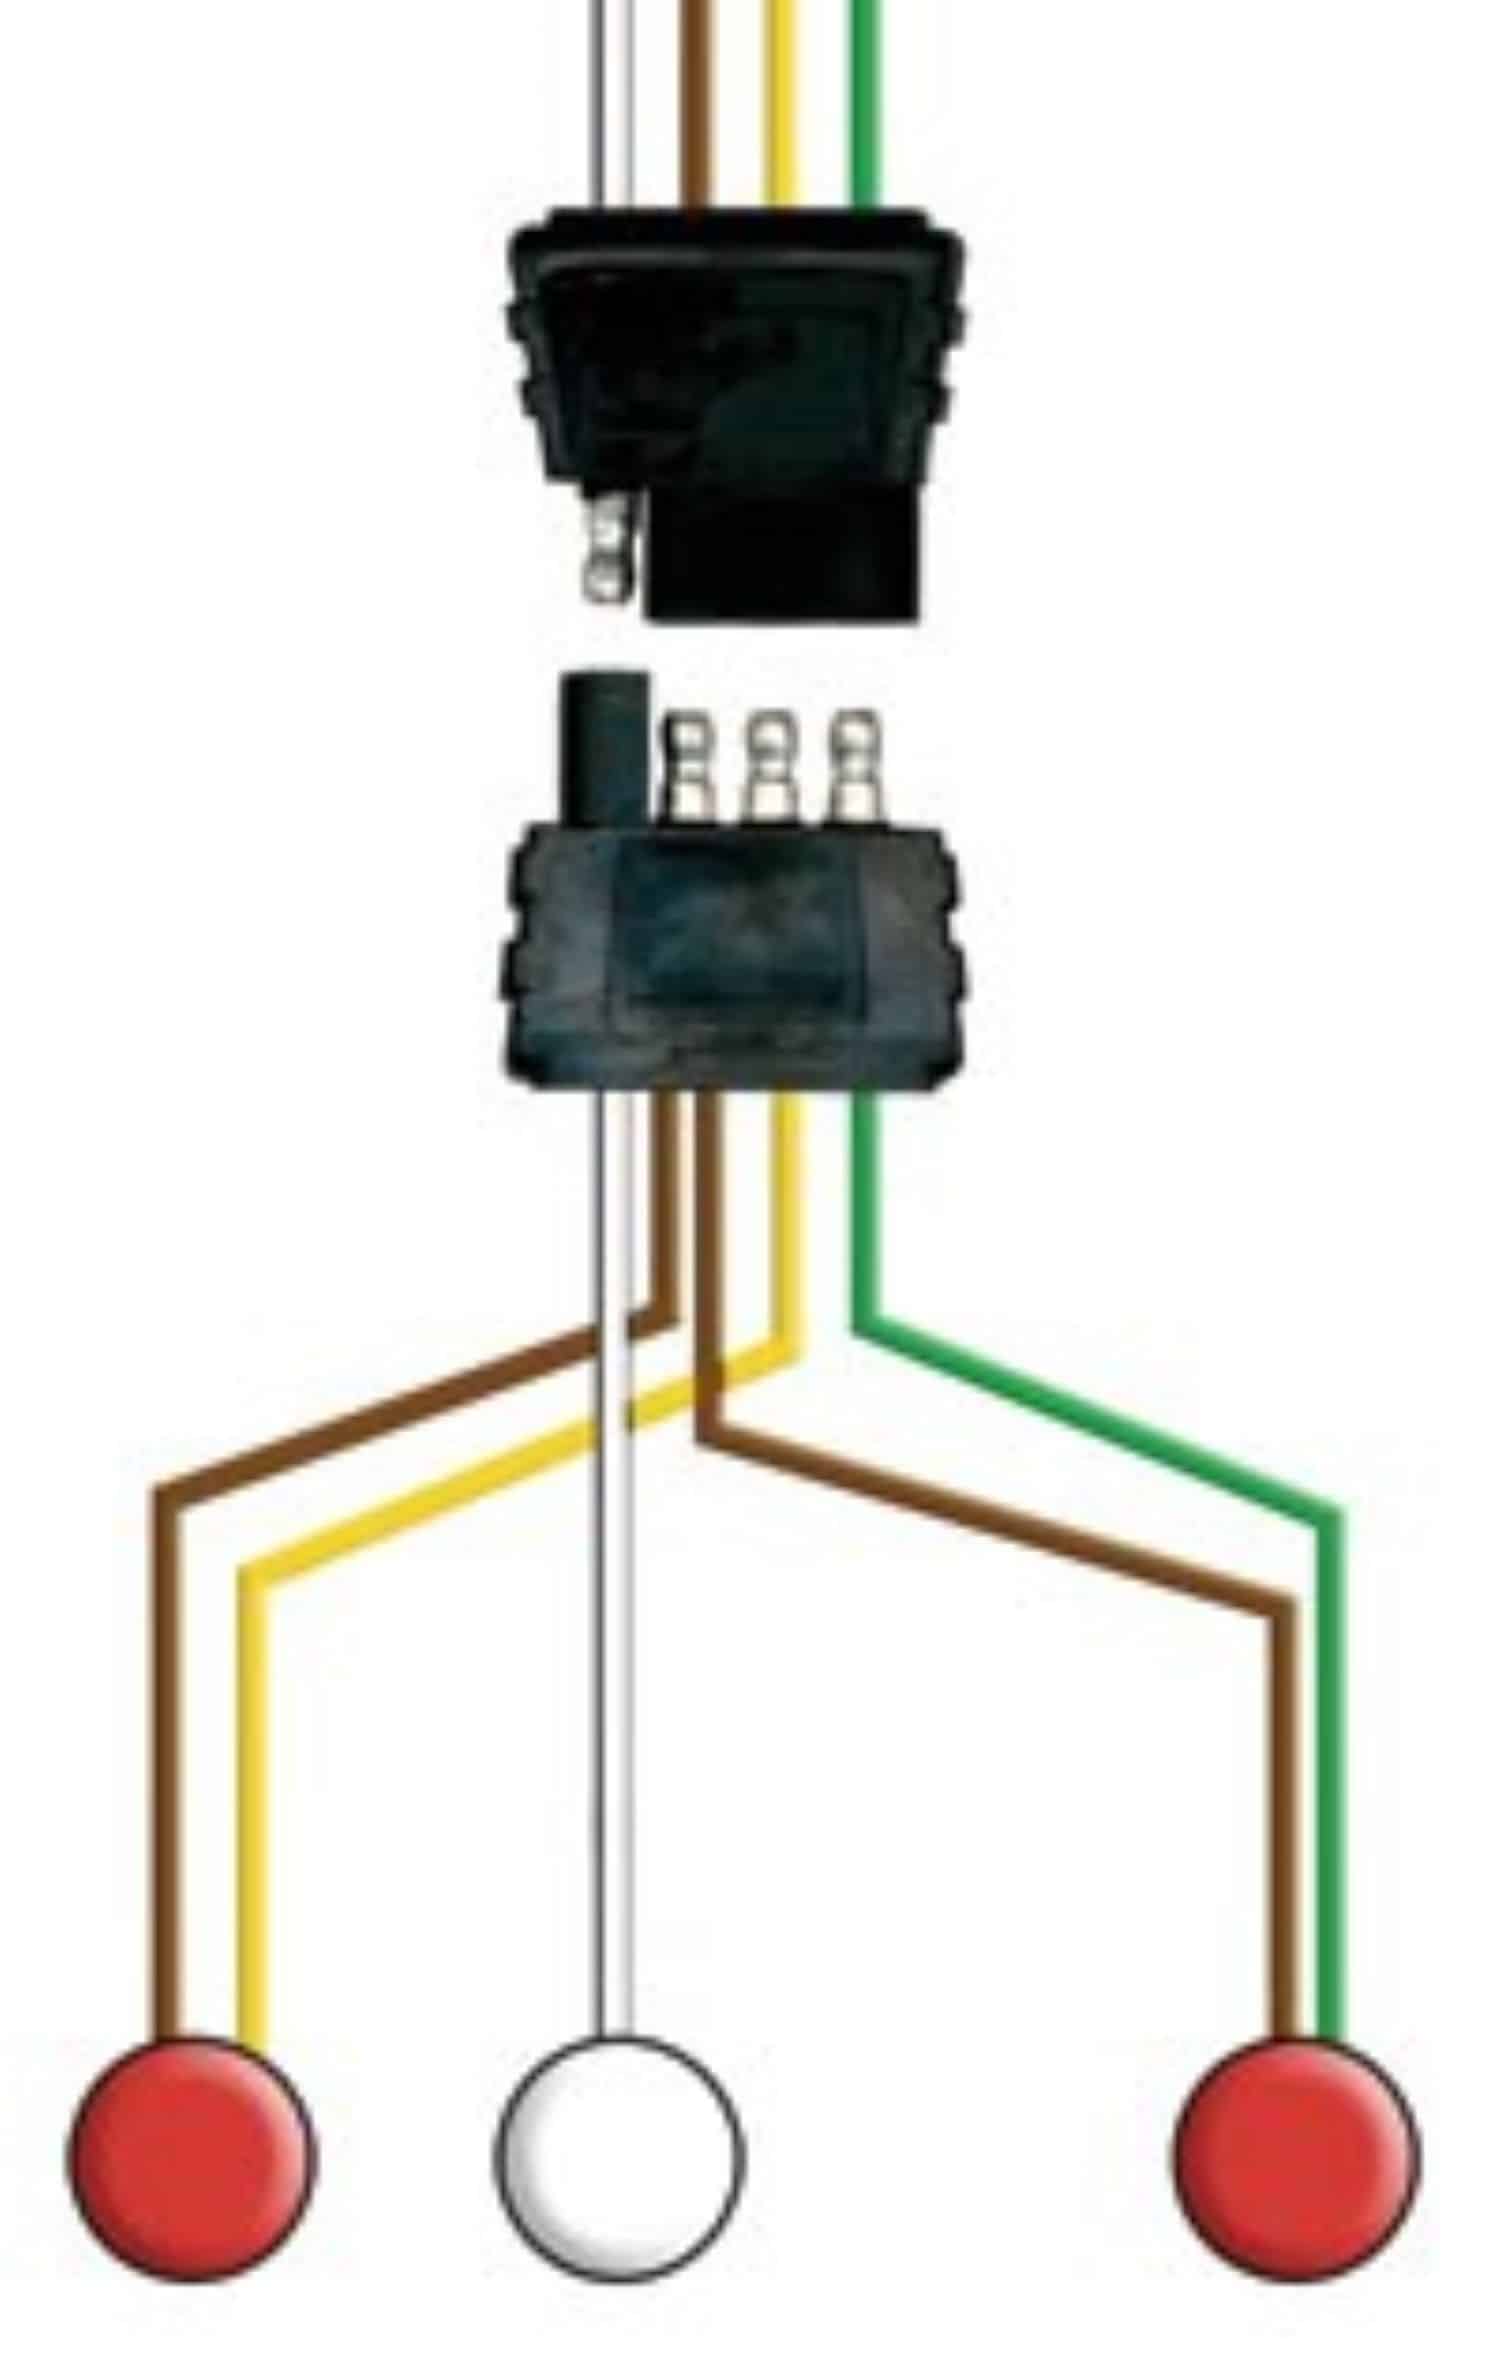
4-Way Flat
The most common type of trailer connector is a 4-way flat. This connector contains 4 or 5 wires, depending on whether you have a wishbone harness with two running light wires. This connector provides the most basic functions: stop/turn and running lights.
5-Way Flat
This connector is the exact same as a 4-way flat, except for the extra circuit, which is usually for a reverse lockout signal.
6-Way Round
Less common than a 4-way or 5-way, a 6-way round is also used on certain boat trailers. It contains additional circuits for extra accessories like winches, jacks, etc.
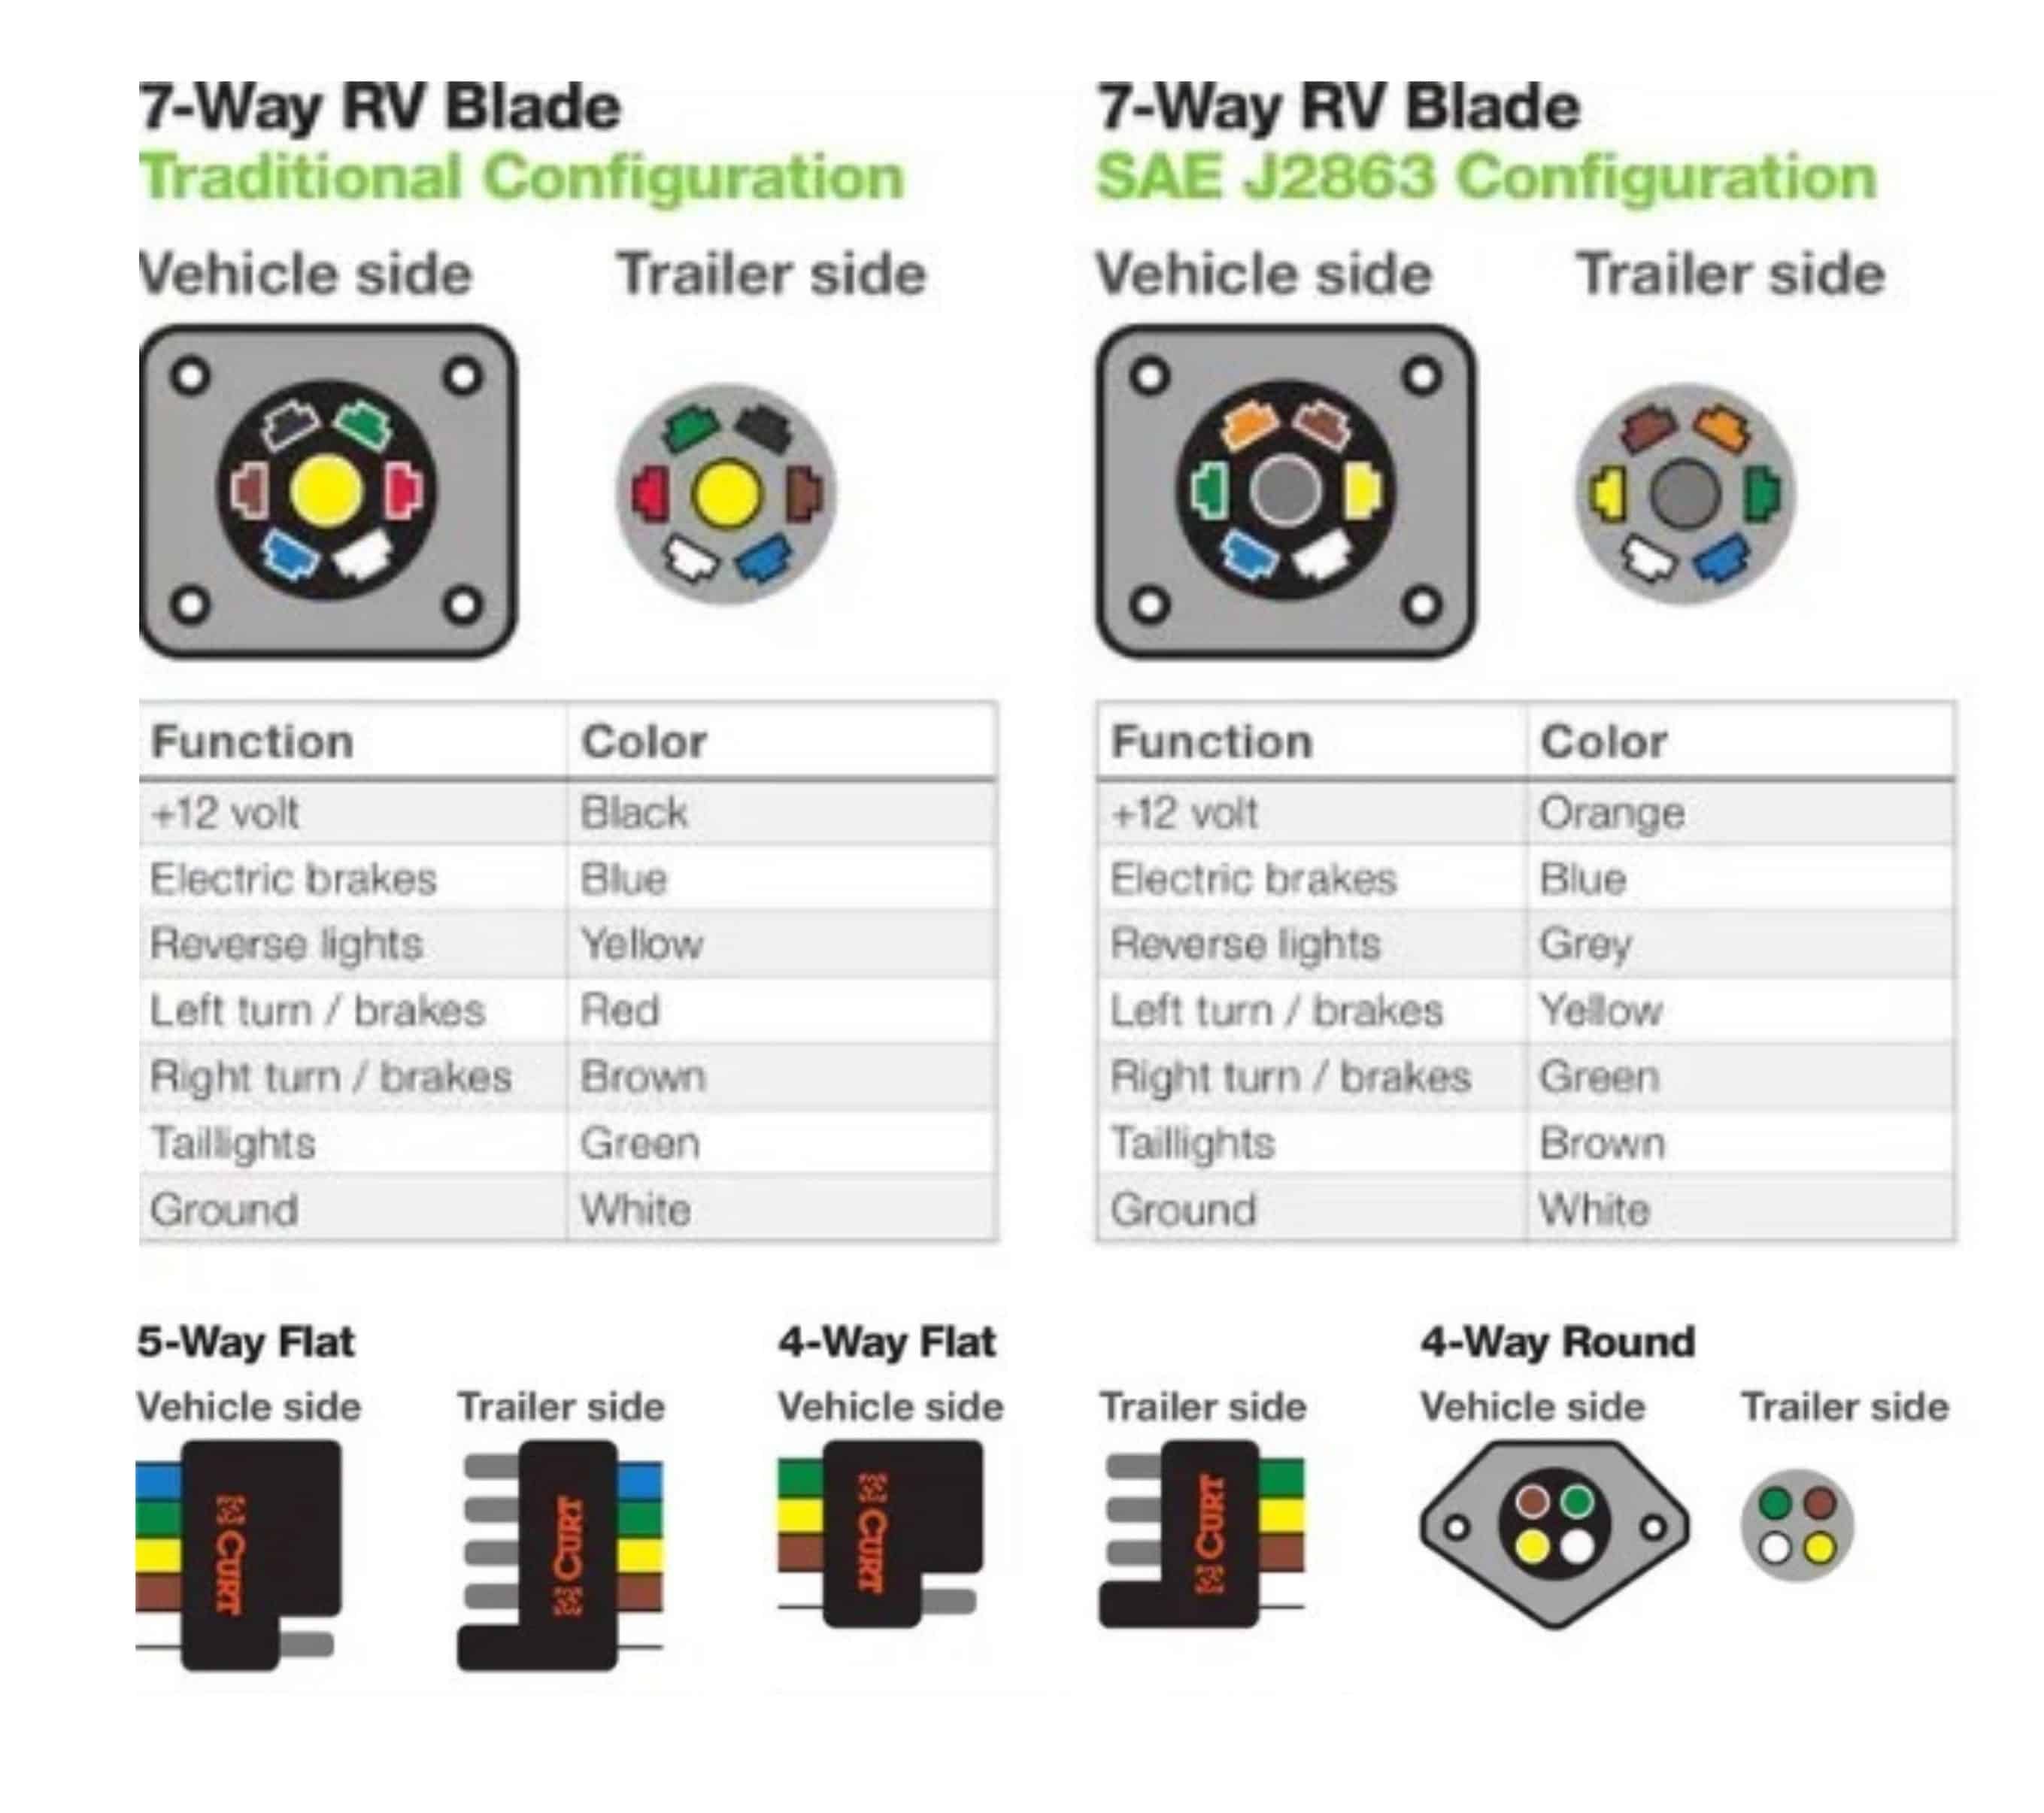
7-Way Blade
This is the most common type of trailer connector found on RVs, but it can also be used on boat trailers. It’s needed when the trailer has multiple accessory or auxiliary circuits.
These are not all the different types of trailer connectors found on boat trailers, but they are the most common and likely what your trailer would have.
Common Wire Colors
| Green | Yellow | White | Brown | Blue | Black | Purple |
| Right Stop/Turn | Left Stop/Turn | Ground | Running | Brake | Battery Charge | Reverse |
One of the biggest headaches of dealing with lights is wire identification. To install a new light, you need to know what functions each particular wire has, and the fastest way to do this is by matching colors. Although there are industry-standard colors, manufacturers can use different color wires depending on what they have.
Therefore, it’s important to test the function first before attaching. To do this, you’ll need a test light or multimeter. Hook the trailer to the tow vehicle and apply the circuit you need. Test each wire until you find the one that illuminates the tester. You’ll then need to do this for each of the remaining circuits.
Two and Three-Wire Systems
Trailer wiring is defined by two types: two-wire systems and three-wire systems. Most US-made trailers use a two-wire system. Three-wire systems are required overseas.
A two-wire system means the stop and turn signal circuits are on the same wire and illuminate the same bulb. A three-wire system means a separate wire is used for the stop-and-turn signal circuits, along with different bulbs.
The other wire in either system controls the running lights.
Wire Length and Size (Gauge)
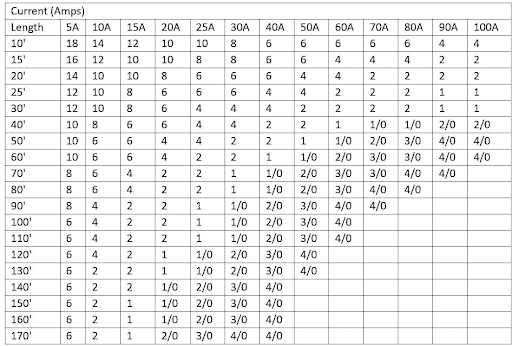
Choosing the right size wire for your trailer can be a tricky task, but it’s also very important. An improper choice could result in a fire risk, so choosing correctly is imperative. The difficulty with choosing the correct size is that there’s not a one-size-fits-all.
Most of your small to medium-duty boat trailers will use either 18 or 16-gauge wire or a mix of the two. However, this can vary based on how many lights are on each circuit, the type of lights, and the length of the trailer. Review the chart above to ensure you’re using the proper size.
Do’s and Don’ts of Boat Trailer Ownership
If you’re anything like me, you just have to make some mistakes on your own to learn from them. However, I also ask, “Why didn’t anyone tell me that?” There are plenty of mistakes for you to make yourself, so let’s go over a few tips I wish I had known sooner.
Don’t – Dunk Hot Trailer Lights in Cool Water
We all probably know you should unplug your trailer connector before launching your boat. Did you know that you should also wait for your taillights to cool down before doing so? Granted, by the time most of us prepare to launch, the taillights have had time to do so, but if you’re in a hurry, they may not.
When driving to the lake, your lights emit heat. If you were to back up your trailer into the water while the lights were hot, there’s a chance for the light housing to suck in water due to the expansion and contraction of the plastic housing caused by rapid temperature changes.
Do – Check Ground Wire When Troubleshooting
The first thing you should inspect when troubleshooting your trailer lights is the ground wire. Most trailer wiring issues are caused by bad grounding, so this should always be the first thing you check.
You may have one singular ground, usually near the trailer connector, or multiple, one for each light. Regardless of how the trailer is wired, make sure the wire is secured to a clean metal surface, free of any paint or debris.
What is Corrosion?
Corrosion is every boat trailer owner’s worst nightmare. It’s caused by moisture coming into contact with an electrical circuit. It appears as a whitish or greenish powder, which, over time, can disrupt the flow of electricity by eating away the metal in the wire.
Ensure no bare or exposed wire is subjected to moisture to prevent corrosion. This is done using heat shrink on connectors or terminals, which seal out any water or moisture.
How to Replace a Trailer Light
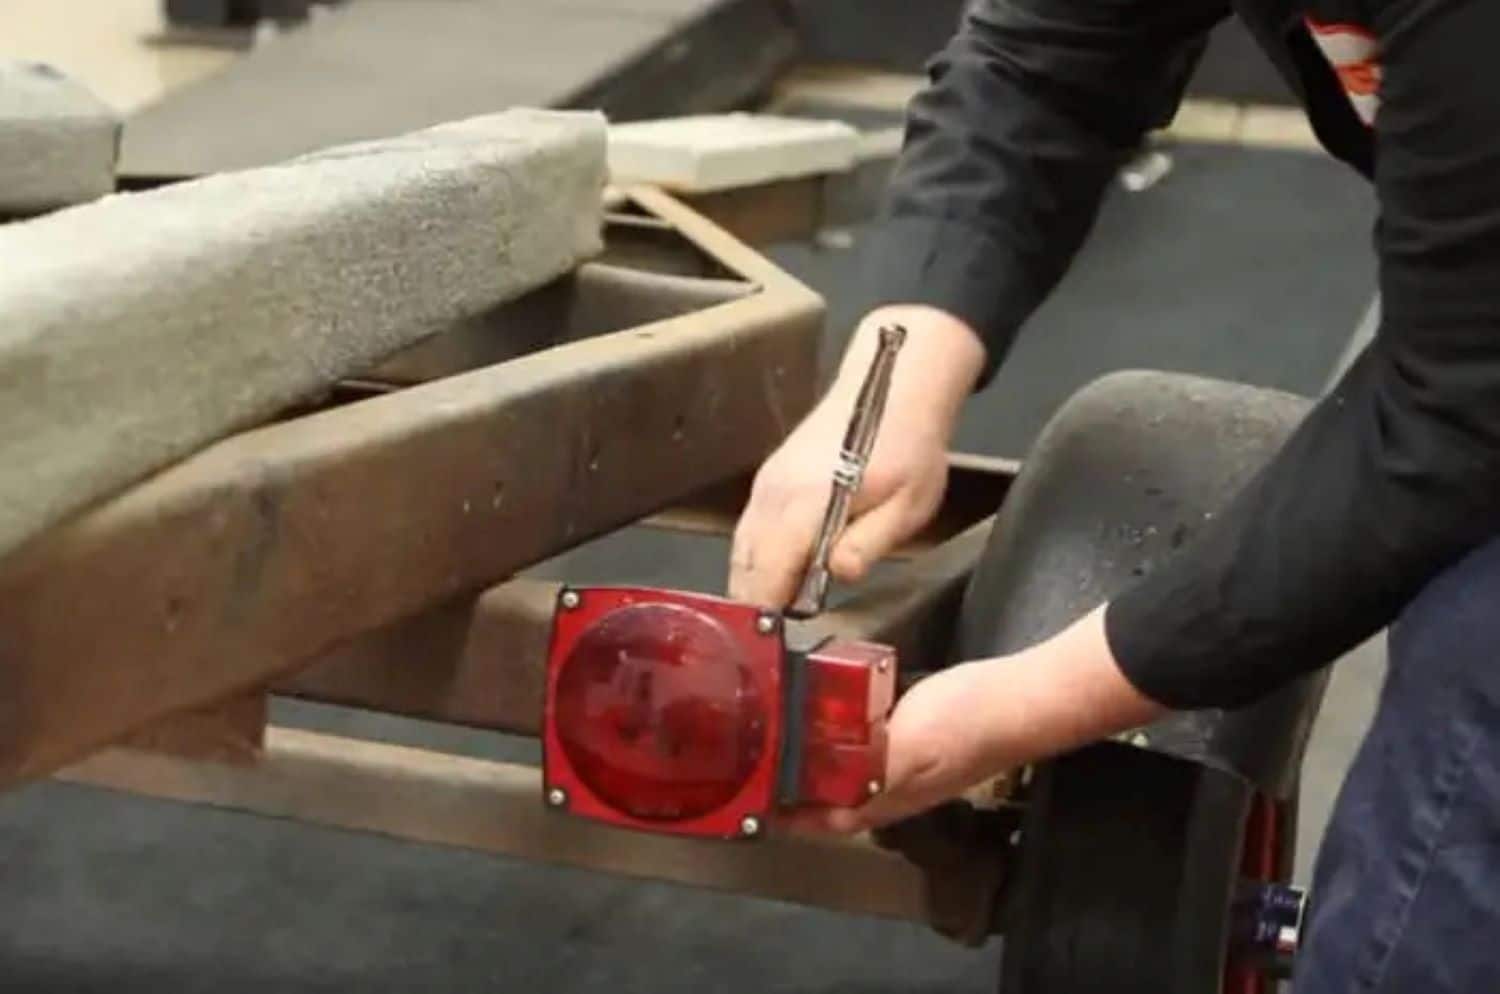
Replacing a trailer light is easy. To start, you’ll need to gather some tools.
- Screwdriver
- Wrenches
- Wire Strippers
- Electrical Tape
- Wire Connectors
- Wire Crimping Tool
- Heat Shrink
- Heat Gun
Once you have all the tools, you can begin installing your new lights. Start by unbolting the light, then mark the wires by function with tape so reconnecting is easy. You may need to test the wires with a circuit tester if the old light is not labeled or uses an uncommon wire color.
Cut the wires a few inches back from the light. Remove ¼” or so of the jacket from the old wires left on the trailer and install appropriate wire connectors with a crimping tool. Seal the wire connectors with heat-shrink tubing. Some wire connectors have built-in heat-shrink tubing for added convenience.
Trim and strip wires on the light to the appropriate length. Attach wires from the light to wires on the trailer using a crimping tool. Seal connectors with heat shrink. Re-secure the light base to the trailer, verifying the ground connection.
It might not be your favorite thing, but working on your boat trailer lights is sometimes necessary. It can not only save you money, but it will also help ensure you don’t miss any days at the lake. Hopefully, you can tackle the next lighting issue or upgrade without taking it in for service.
Let us know in the comments below if lighting issues ever stopped you from going on a trip.
[…] What You Need to Know About Replacing Boat Trailer Lights […]
[…] Wiring Harness – The wiring harness is what transfers the signals from the vehicle to the lights on the trailer. The most common types of connectors for boat trailers are 4-way flat, 5-way flat, and 7-way round. […]
[…] your tires are typically the biggest failure point, lighting issues can be just as frustrating. They can be finicky and difficult to diagnose. Before every trip, you […]